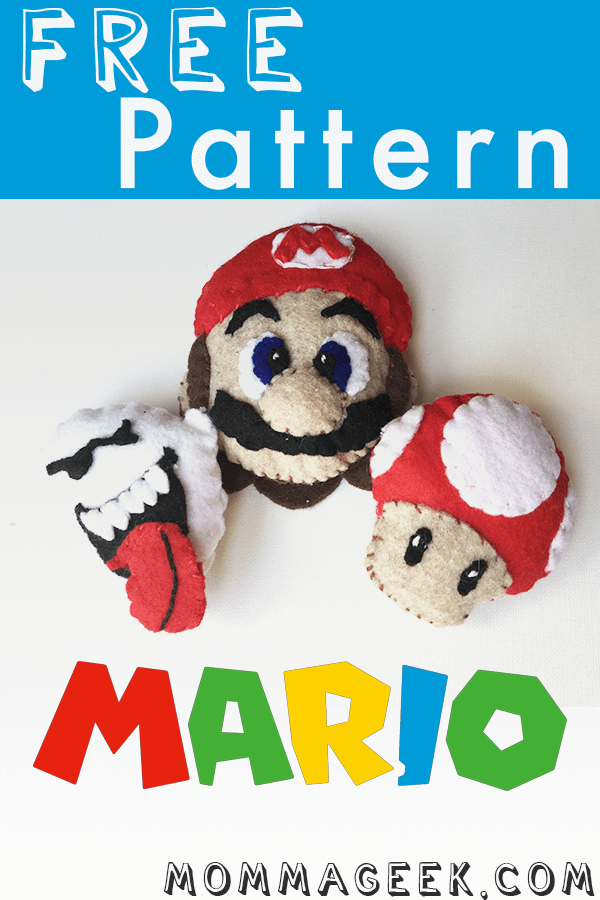
These cute little felt Power Up mushroom and Boo inspired by Mario are fun to make and even more fun to display. My kids love them, I love them, my cat loves them.
I have 3 characters to share with you. The first 2, Boo and a Mario power up mushroom are pretty quick to make. Mario, while not difficult, does take more time as he is a more detailed character. You can find a post on that here.
These little felt characters are great for beginners or kids because you don’t have to cut or sew perfectly. Since the thread pulls on the edges of the felt, it will hide many imperfections.
Grab your free pattern here:
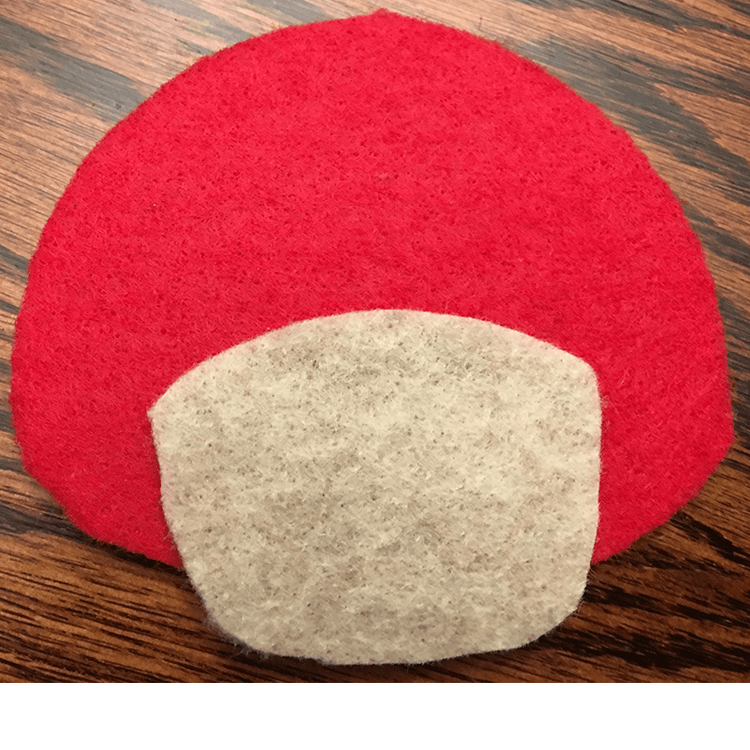
The power up mushroom.
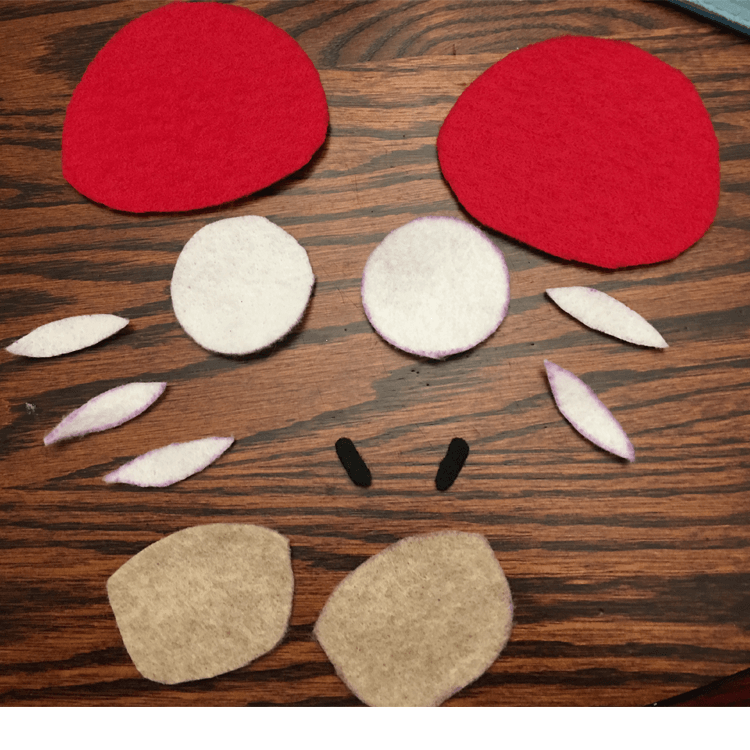
The first thing to do is to cut out the pattern in the colors shown below. You will have 2 mushroom caps, 2 eyes, 2 faces, and several pieces for the mushrooms spots on both the front and the back of the mushroom cap.
In the picture below, It looks like I have 5 side spots, one of those is actually the pattern piece. You will only need 4 side spots.
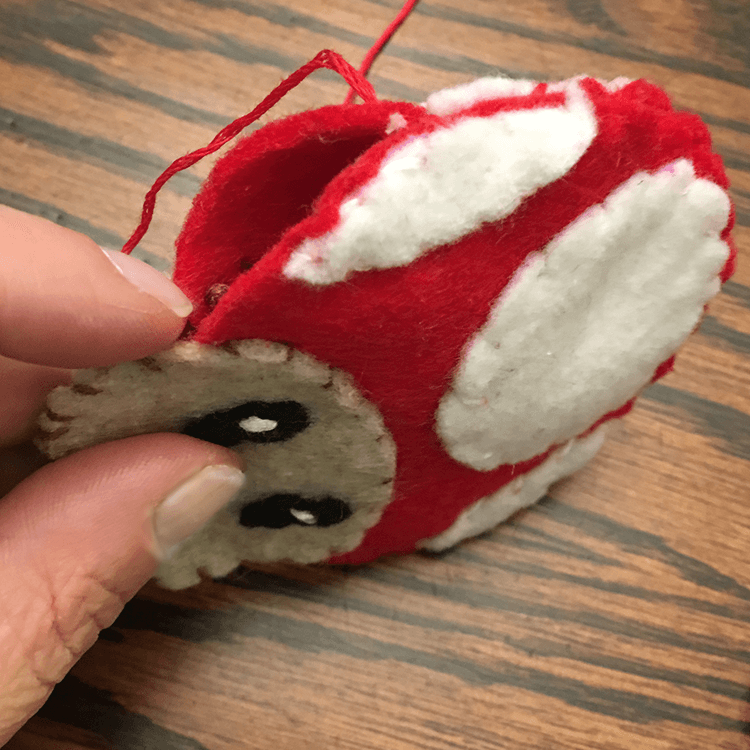
Once you have your pieces cut out, place the face on to the mushroom cap like below. You want to make sure you leave some face below the mushroom cap itself.
When you start to stitch, you will come up through the back of both pieces of felt. When you push your needle into the back you will want to go in slightly under the top piece. This helps hide the brown so that you don’t have brown thread on a red background.
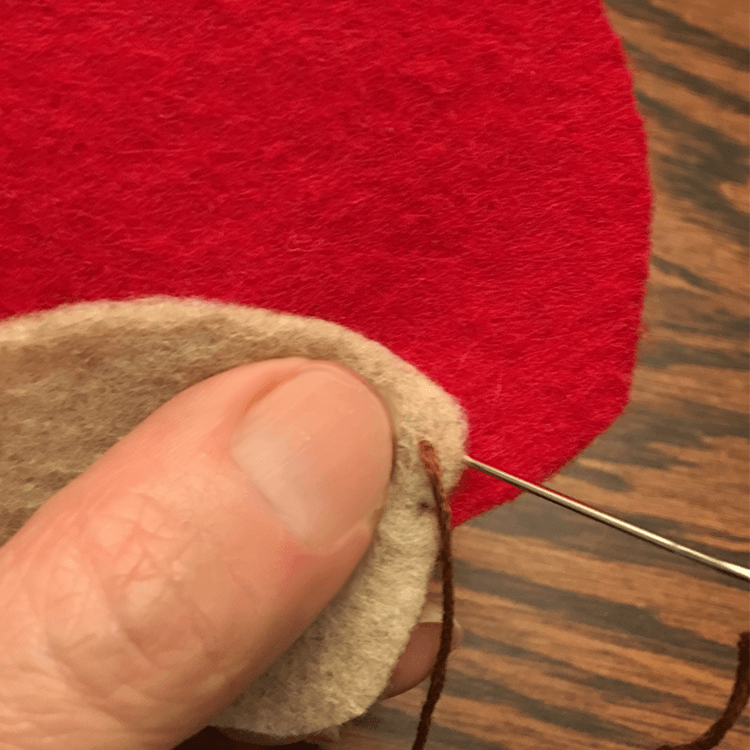
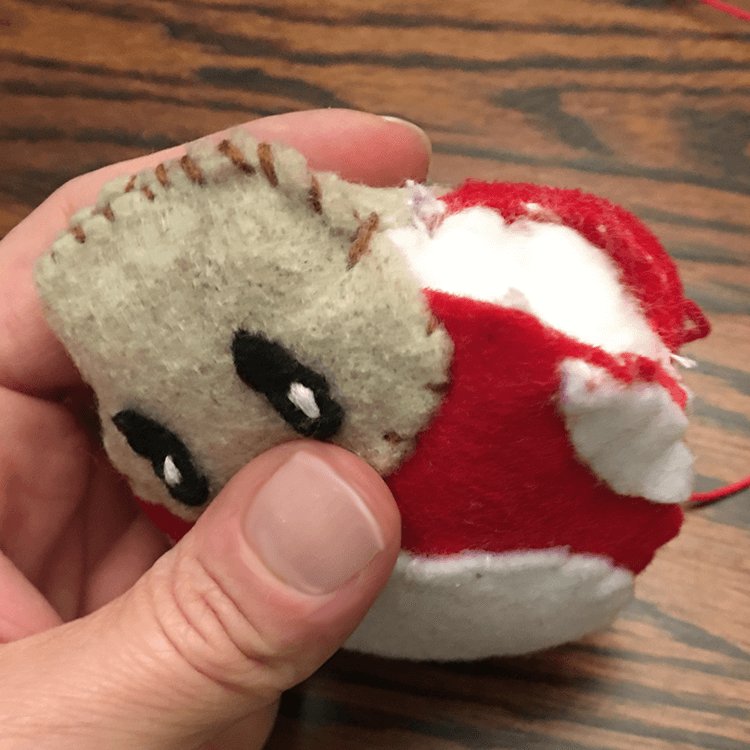
Here you can see that the brown thread is only seen on the face piece itself. I didn’t have any thread that matched the face color, so I just used the brown that I had on hand.

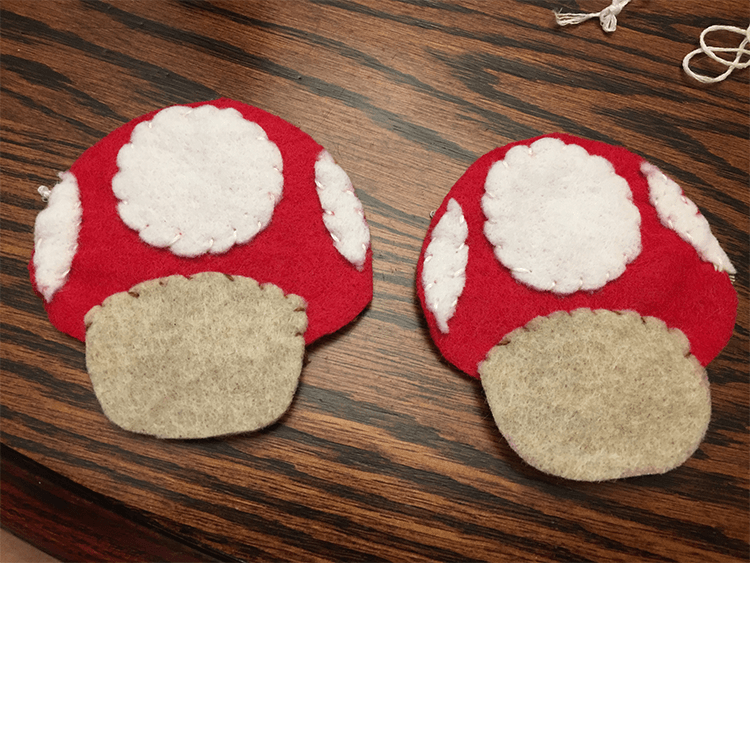
Once you are done sewing on your face piece, you can stitch on the mushroom cap’s spots to look like the ones below. You should have a front piece and a back piece that look similar. It’s not important that they be identical, just similar.
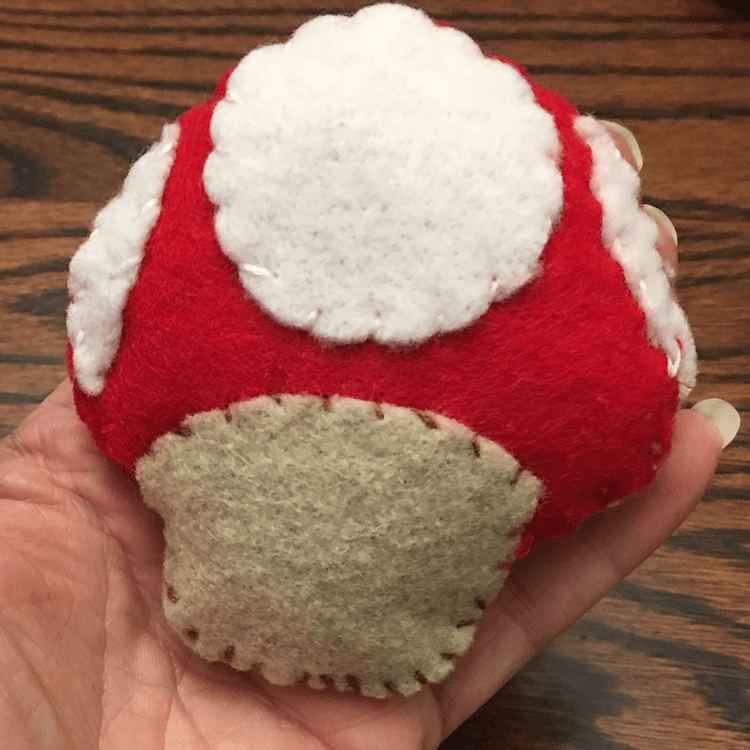
The next step is to lay the pieces wrong sides together. When you stitch these together, you will want to match the face pieces with brown thread and the red mushroom cap pieces with red thread.
Before you finish going all the way around the mushroom, leave a spot to allow for filling. You don’t need to tie off your thread at this point, you just need to leave a gap.
Stuff your little mushroom with batting or any other thing you would like to use. I didn’t have any batting so I used cotton balls. If I had used batting, the mushroom would have had a softer feel than by using cotton balls.
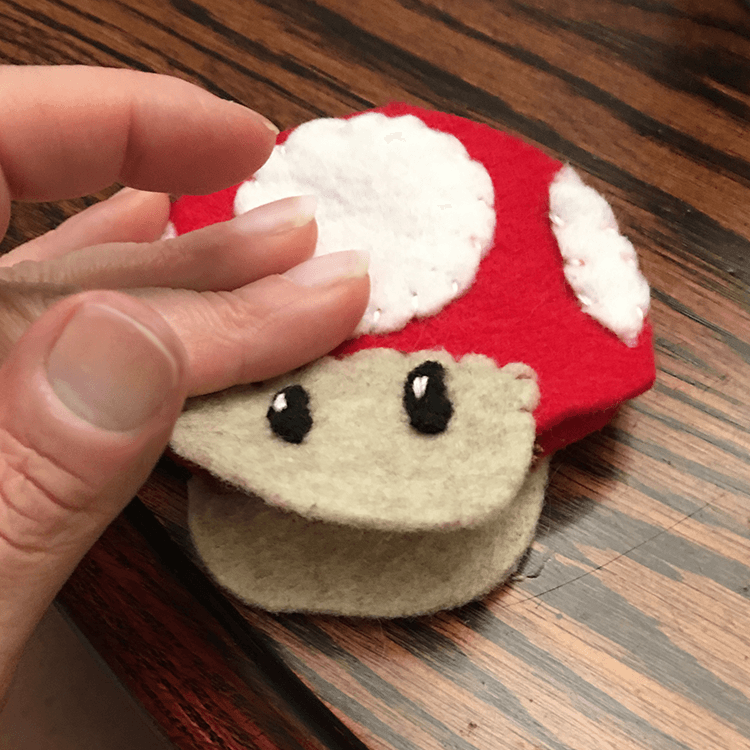
After filling, finish off by stitching up the gap you made. The back of your little mushroom will look like this.
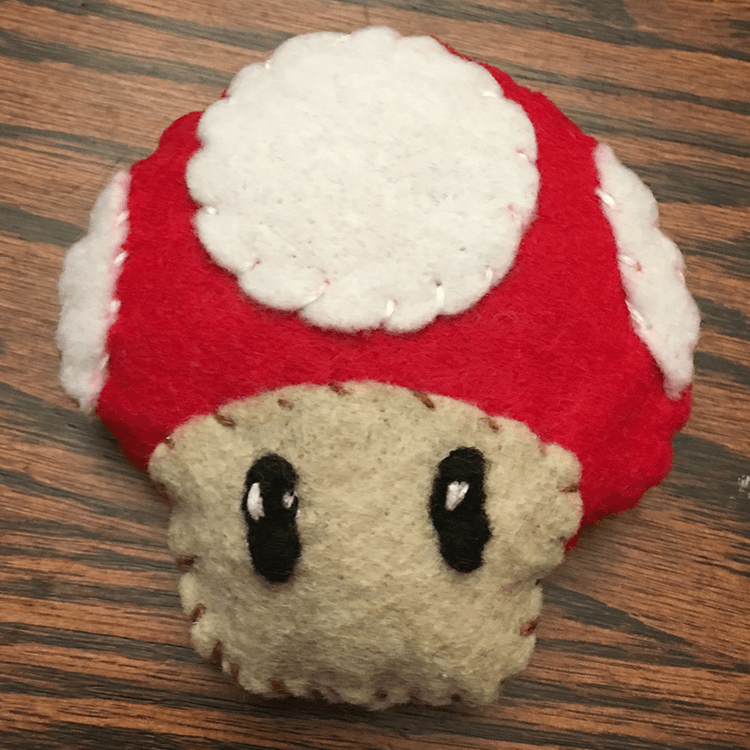
And the front will look like this. Isn’t he adorable?!?!?!?!
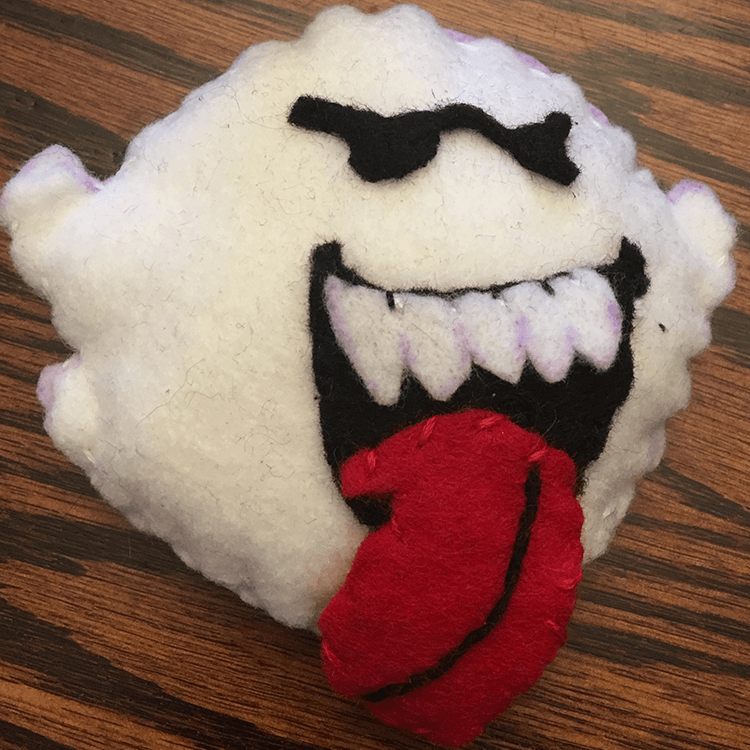
Boo!
Boo is made in the same way that the power up mushroom is made, so I am not going to go into as much detail.
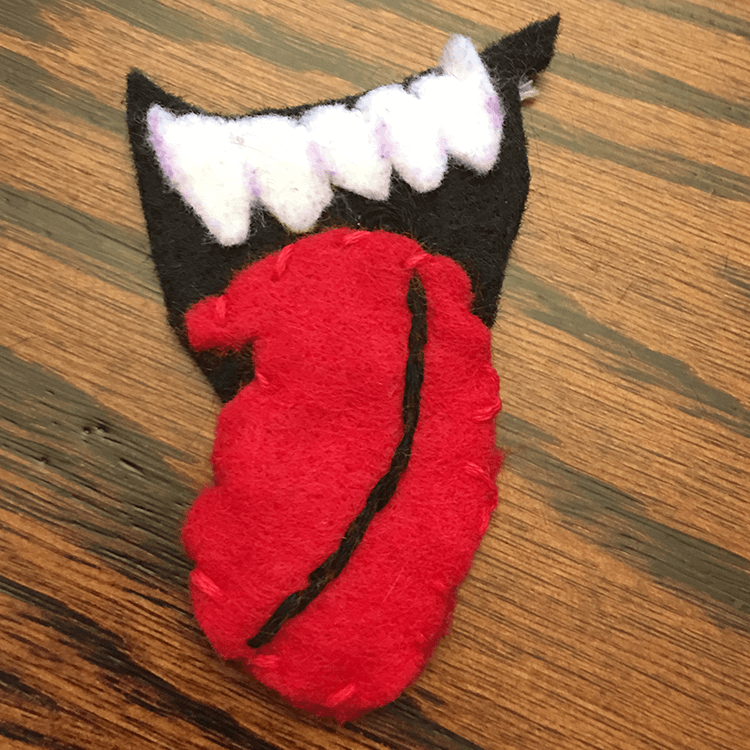
You will cut out 2 boo bodies, 1 boo mouth, 1 boo teeth and 1 eye piece and 2 tongues.

The first thing that you will do is to stitch the 2 tongue pieces together.
I have used thread to stitch a tongue detail, but this is entirely optional. Stitch the teeth and the tongue to the black mouth.
Lay the mouth onto the white body and decide where you want your eyes to go.
Start by stitching the mouth in place. Once that is done, stitch down the eyes.

Following the same steps used to stitch together the front and back of the power up mushroom, stitch the front and back of boo, leaving a gap, and then filling.
This post may contain affiliate links. If you click & make a purchase, I receive a commission! Disclosure policy here.