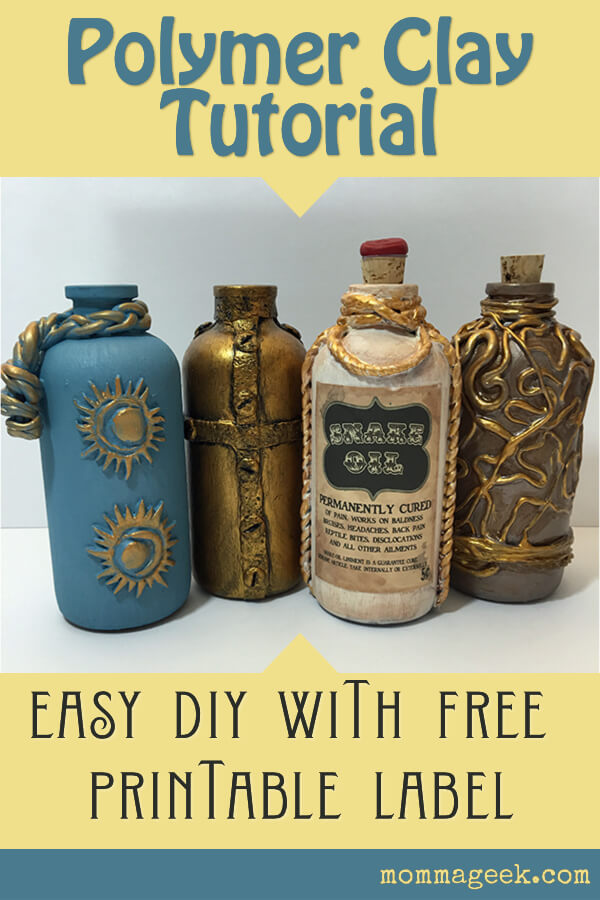
In this polymer clay idea project, you will learn how to create your very own snake oil bottle. You can also download a Snake Oil printable label, to really get that fun, somewhat authentic look. This tutorial is number 4 in the polymer clay ideas for bottles and jars series.
The technical details including, how to bake on glass, how to cure paint, a complete supply list, etc and can be found in this tutorial.
You can also check out:
Let’s go ahead and jump right into the tutorial.
The first thing you will want to do is either create a snake oil label of your own or download your free copy of the one I created.
If you chose to download my custom label, you may need to scale it using your printer settings in order to make it fit the bottle you are working with.
Once you have your label cut out, place it on the bottle and mark where it is going to go. I used bits of polymer clay to mark out the corners of my label. By marking where the label goes now, I can be sure not to place any decorative polymer clay in the way of where my label will go.
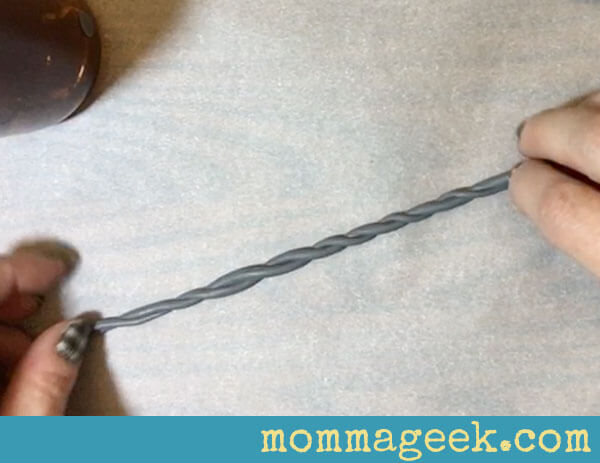
To make the detail for this bottle we will use the same clay technique several times.
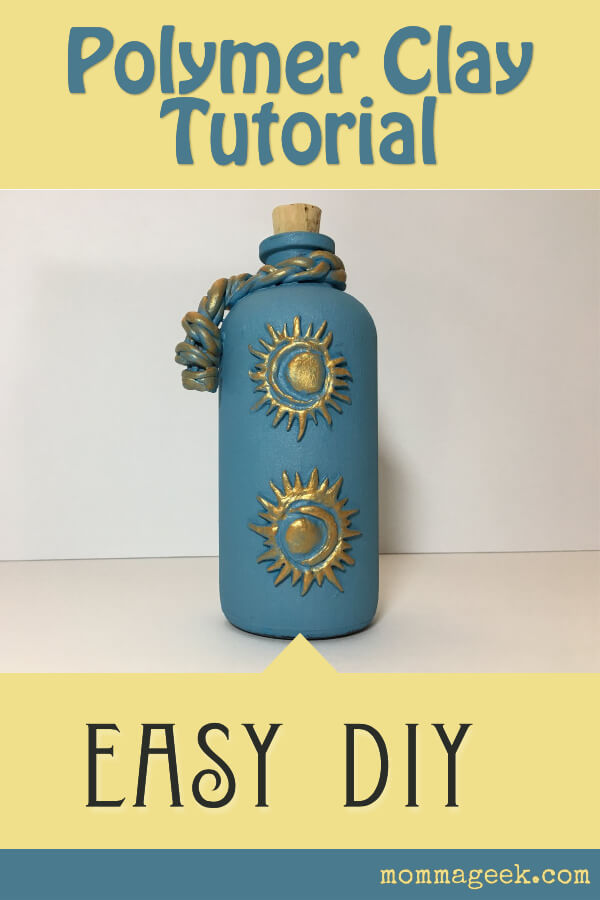
You will make a snake or rope out of your polymer clay and then fold it over itself, or use a second polymer clay snake and twist the two snakes together.
You will want to try to make all of the snakes roughly the same size so that all of the detail on the bottle matches.
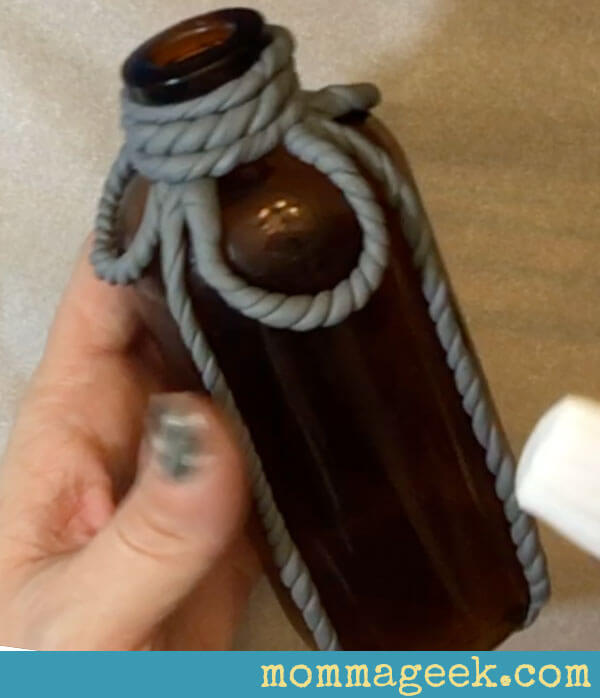
Once you have a twisted snake or rope ready, you can begin to place them on the bottle.
As you can see in this picture, I have a spot marked off for my label. I placed my ropes slightly back from that area. To fix it to the bottle and smushed the rope against the side of the glass at the bottom of the bottle.

Continue placing ropes around the bottle.
You can do 3 or 4, whatever you like. I did 3 ropes which gave me 4 sections.
Above each of the 4 sections I placed a snake rope in a drooping, swag type way.
When I had this polymer clay idea, I was picturing a snake oil salesman at the circus. The draping ropes and gold and decorative detail all came to mind as a fitting tribute to the days when cure-all bottles were purchased out of the tailgate of a wooden wagon.
After you have covered your jar with Mod Podge and allowed it to dry,
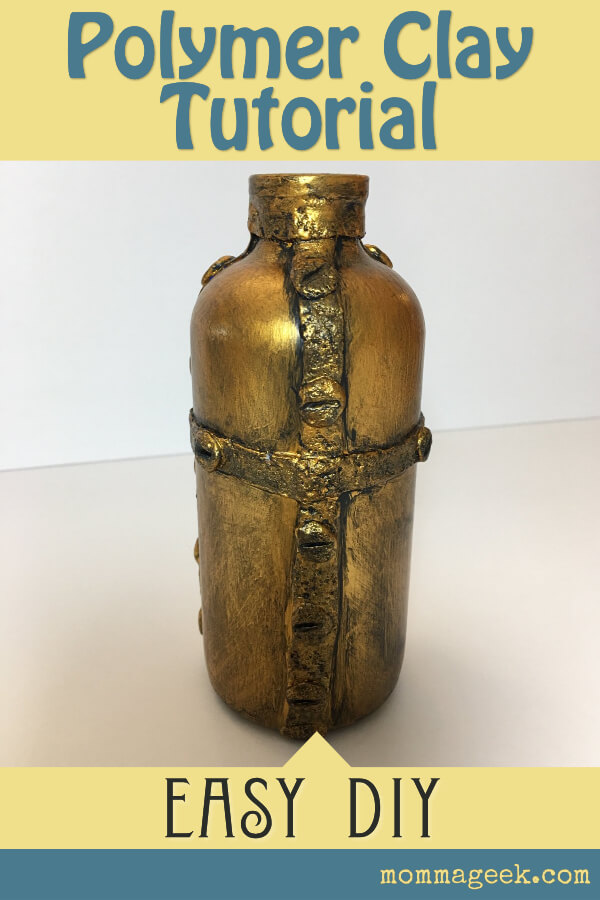
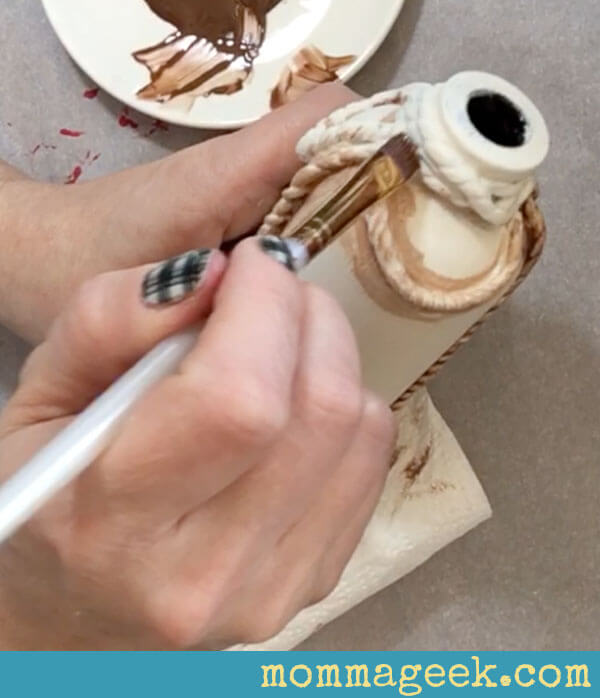
you will want to give it a coat or more of paint. As you can see in the picture below, one coat of paint was def not going to cut it. To find out how to cure your paint between coats, check out this tutorial.
Notice the pooling of paint under the polymer clay detail on the bottle. It is important to sop that up with your paint brush before it dries. If you leave these pools of paint and allow them to dry it will take away from the detail itself. It will fill it in, essentially. When you have to do multiple coats of paint, it doesn’t take long before those pools of paint really start to get large.

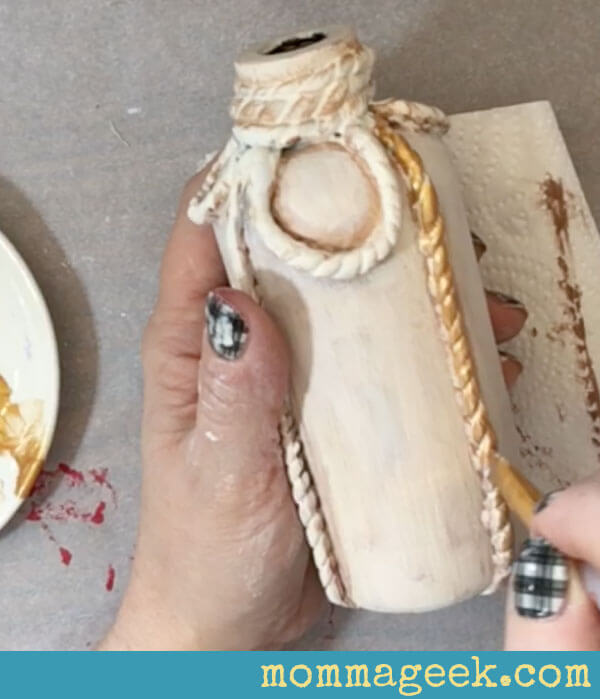
Once you have enough paint on your bottle, it’s time to start adding some shading and detail.
I first added some brown around any place that I thought would pick up dust and dirt of time. This is a snake oil bottom from the circus after all, that must have been a long time ago.
I used my paint brush to almost scrub the paint in below the detail. For spots like the under side of the rope, it can be hard to get the dark in without that scrubbing motion.
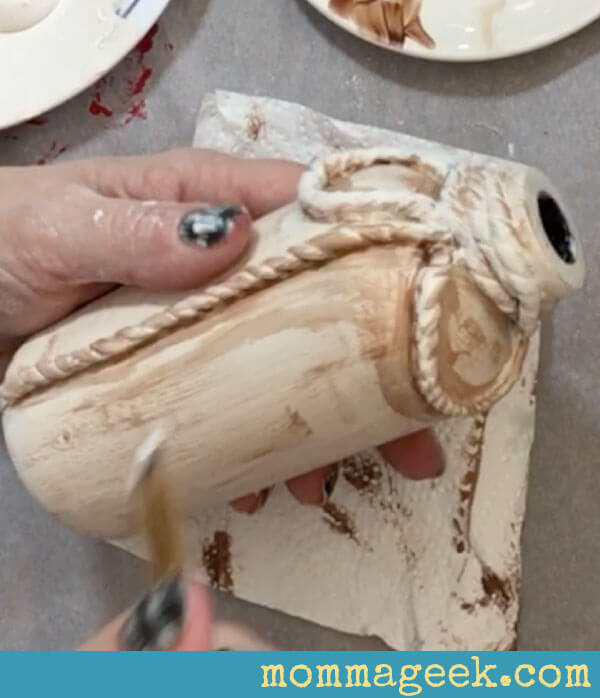
After adding all of the brown detail in on top of a very light colored bottle, it can end up looking very shocking or not blended.
It can look like the brown paint just doesn’t belong there. If yours does this, and it prob will just like mine did, just the some of the base color paint and work it over the top of the brown.
I used a tinted white color as my base coat. White takes a couple or so coats to get really good coverage. So when you are putting the white over the brown paint, you will still see some of the brown showing through. This is perfect for what we are trying to achieve.
Now, you will add the gold paint to the polymer clay detail of your bottle or jar.
You can do as much or as little as you want. Remember to flip your jar over and look underneath the drooping ropes. If you leave that all white or have some bright white spots it can end up throwing off the look you are going for.
Let your bottle dry and then get started on the label.
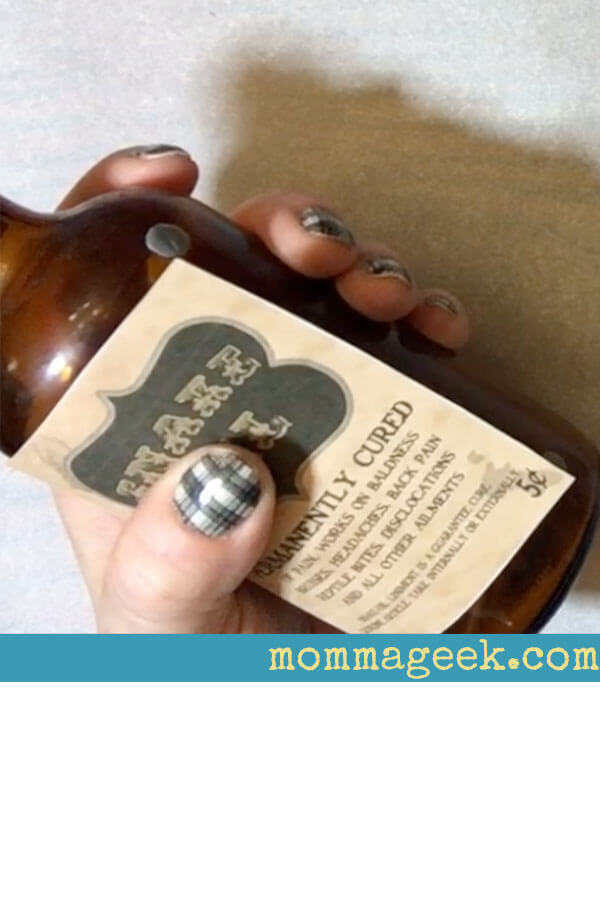
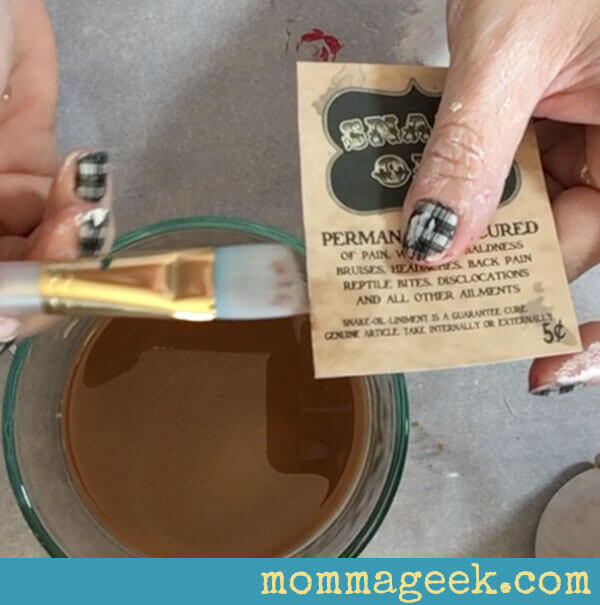
We are going to age the label. I took a small bowl of water and added dark brown paint to it. I didn’t want to paint my label, I just wanted to stain it. An old label would surely have stained over time, right? You can either dip your label into a small amount of this stain or you can just barely touch the edges with the bristles of a brush. As Bob Ross would say “Just lightly blend it, one hair and some air”. Take his advice seriously. This label is made out of paper, and wet paper is easy to rip. And a rip is not all bad, after all this bottle is supposed to look wooden buggy old.
Wait a couple of minutes for the label to dry and sturdy back up.
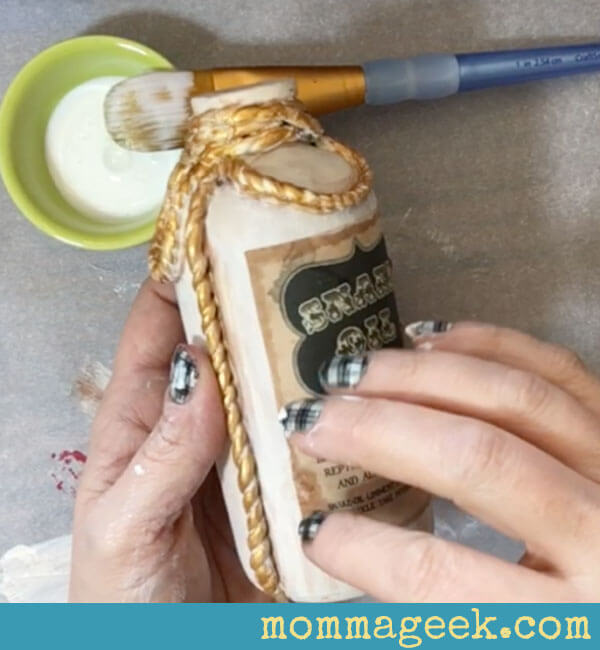
Then flip it over and coat the back with some Mod Podge.

Place the label onto your bottle.
The Mod Podge will allow you to move it around a little bit once the label is placed. Then take your finger and dip it into the brown water stain mix that you made earlier and Bob Ross style, ever so gently dab around on the edge to look like stains and water marks.
Last but not least create a faux wax seal for the top of your cork.
I have no idea if this is at all historically accurate, but at my pretend circus it is a mark of a genuine guaranteed cure all.
You can really do this anyway that you want. I rolled my clay into balls and then scrounged around my house until I found something that I thought might make a good imprint in my clay. It is a Skylander piece from one of my kid’s video games. I could have used a coin or a leaf or the bottom of a spice bottle, or just some random lines or spirals.
You could make your self out of red clay, however I didn’t want to open up any more clay. I used gray and then just painted it red after it was baked. You can glue the seal to the top of your cork.
I don’t recommend using hot glue though. That will add thickness or a space between your seal and your cork. Just use any type glue you have handy such as school glue or super glue.

That’s it! You’re done.
My snake oil bottle sits proudly in my guest bathroom next to my sink. I put a bit of dried lavender in it and tied a gold ribbon around the lavender. Yes, I am pretty pleased with my self. Giggle.
I’m always look for new polymer clay ideas and this one was so much fun to make.
Be sure to check out the video below and grab your free snake oil printable here.