This tutorial is going to show you how to take make a decorative polymer clay jar or bottle. Are you always on the look out for easy polymer clay project ideas like I am? This polymer clay project idea is not only fun, it’s easy. And, you don’t need to be an artist to create these polymer clay jars and bottles. I have used polymer clay for years. I love to squish it between my fingers and roll it around into balls. And, I have followed tutorials on youtube, and you know what? I have never successfully made anything that came out well. So, I sat and I thought, what can I do? With my lack of polymer clay skills, what can I create? And, voila, this fun little polymer clay idea popped into my head. So, the supplies you will need are:
- Polymer Clay
- Some bottles or jars. (I found mine at a consignment shop, but these are very similar: (2 pack) or these (6 pack)
- You will also need some Mod Podge
- A large’ish paintbrush.
- Some acrylic paint
- Metallic acrylic paint. I keep glorious gold and shimmering silver on hand. I love this stuff.
- A baking sheet
- An oven
- Parchment Paper (not required but helpful)
- A quick note: You don’t need a lot of polymer clay for this project. You could get just a few packages if you want. I use this because it comes with a ton of different colors, a storage box and it is the softest polymer clay I have ever worked with. It takes hardly anytime to get going with it.
Notice: This post contains affiliate links. When you click on a link and purchase something, receive a call commission from each sale.
So, if you can do this:
Polymer Clay Snake
You can turn this:

Plain Brown Apothecary bottle
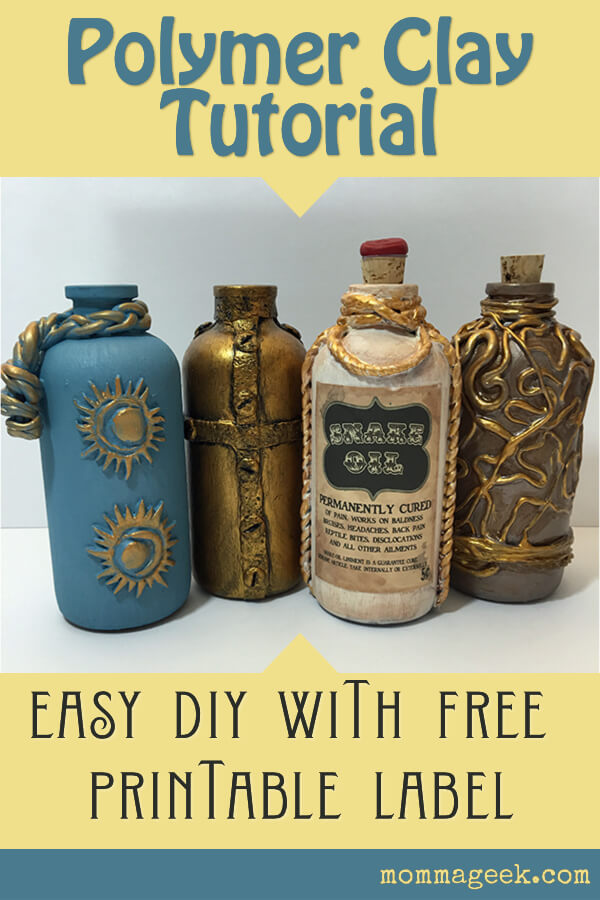
Into this:
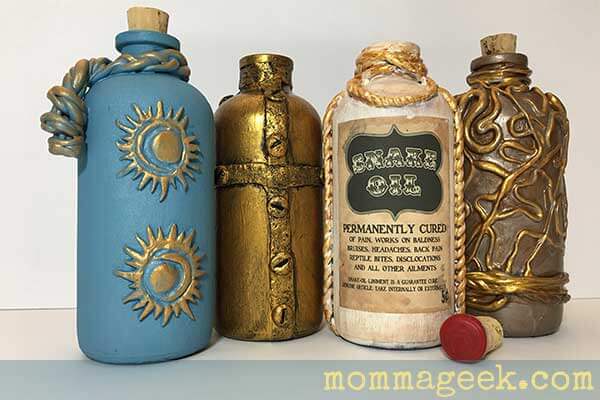
Finished Polymer clay bottles and jars
I made 4 different polymer clay jars / bottles. I’ll walk your through the technical or not so technical stuff here and you can also check out the video at the end of the tutorial.
I feel like I should add a disclaimer: Don’t eat the Mod Podge or paint or clay. Don’t pick up or touch hot things with your bare hands or other skin covered body parts. Don’t put any of the items in this tutorial into your eyes. Don’t serve food or beverages out of these bottles, they are decorative. “Why can’t I drink out of it", you ask? Because these are covered in paint, and as previously mentioned, don’t eat paint. Don’t put these in the dishwasher. Broken glass is sharp. Hot stuff burns. Cats meow. If you or your bottle are abducted by aliens, please let them know where you found this tutorial. Note: not responsible for probings.
This first bottle I made was really abstract. It looks great, and the design is about as easy and random as you can get.
- Pick a clay color that is not going to be too hard to paint over later, or one you don’t mind showing through the paint a little.
- Then knead the clay between your fingers or on a table until it has a nice consistency. If you’ve never worked with polymer clay before, here are a few pointers.
- Open the block of clay and break it in half, or break a piece off. Do you see how it snaps in half? And little crumbles might have fallen off? That means the clay is too rigid to work with.
- Take the piece you broke off and begin to knead it between your fingers, or on a table. You are just trying to massage the clay. As it softens the clay will warm up. Keep kneading it until its easy to pull without the clay snapping.
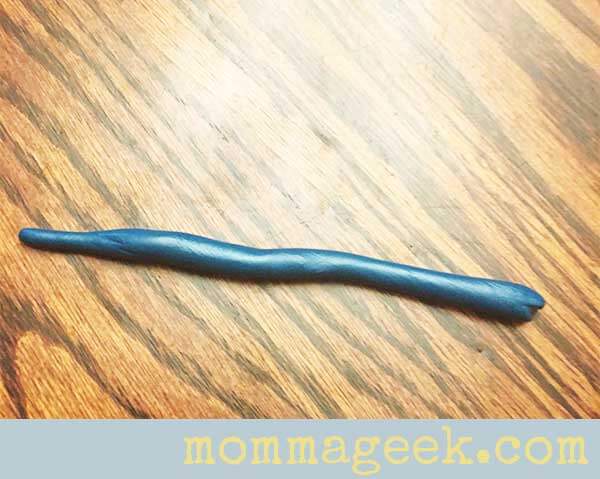
- Pull a piece of your softened clay off, roll it out into a snake like you used to make with play dough. Does it roll easily? Can you fold your snake in half easily without it breaking? If you pull it apart do you see an even consistency?
Notice in the image below that the left side is of polymer clay that has been broken off and has not kneaded. It has striations in the clay from the force of being snapped in half. In contrast the piece on the right side has been kneaded and is smooth, flexible, easily moldable and even shows fingerprints. 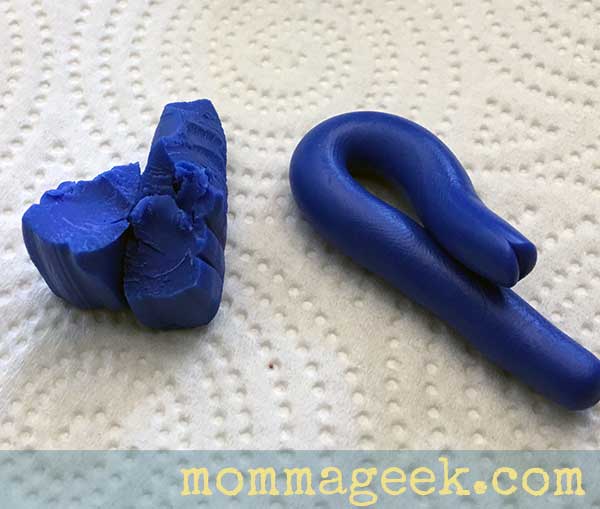
Now that your polymer clay is kneaded, it’s time to get started.
Remember that snake I asked you to make while working your clay? Well, you are going to continue to do that. That’s basically the only skill you need for this first polymer clay bottle. Well, that and don’t eat the Mod Podge. It’s important to start with a clean, dry bottle or jar. It doesn’t have to be crazy clean or anything. So don’t bother breaking out the rubbing alcohol or anything, just soap and water works here. Now, make some snakes. You can make them anyway you want. Big, little, long, short it really doesn’t matter.
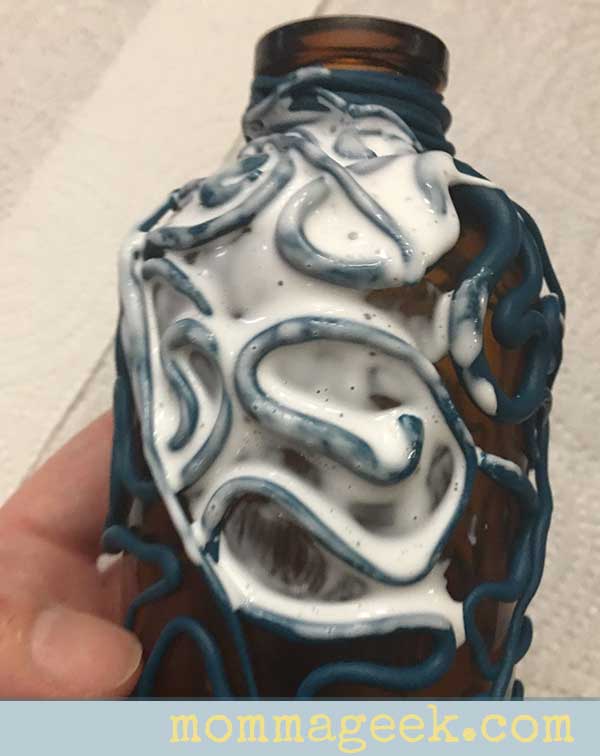
Take your polymer clay snakes and start working it around your bottle.
The first piece that you attach to your polymer clay project may need to be pressed down on one end to make it stick to the bottle. A nice soft clay will stick way easier than a harder clay. If your clay doesn’t want to stay on your bottle, just knead it some more. If you look at the image, you will see that I just squirreled my snakes around in a random pattern. Some are really crooked, some are more straight. My snakes are not all the same width or size. They are just randomly placed.

Polymer clay snakes in random length and thickness are placed randomly around the bottle.
Then I took some this snakes and rapped them around the neck of the bottle.
This was for 2 reasons. 1. It looked really cool. 2. It covered up the spot that I had pressed the clay down to the bottle. I made a snake, folded it in half and twisted them together to give it a rope like appearance. I put that around the bottom of the bottle. 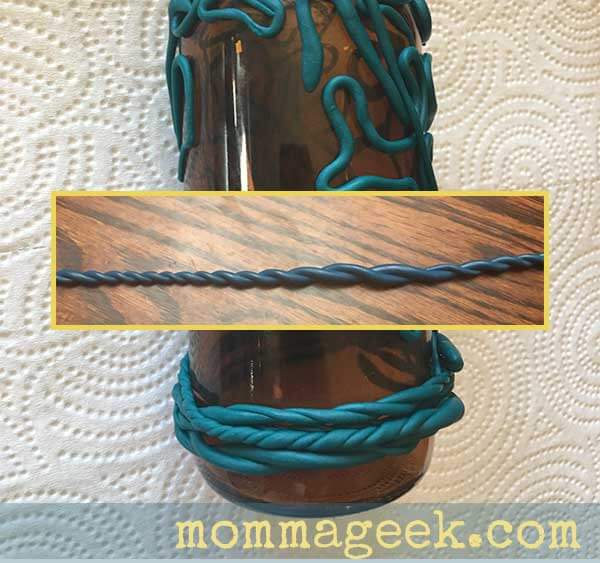
Once you are happy with how it looks, you are going to bake your polymer clay bottle in the oven.
Important notes:

If you are not using tempered oven safe glass or you aren’t sure if you are using tempered oven safe glass, you should disregard the baking temperature that came with your polymer clay.
The glass I am using is NOT tempered glass. So to bake it in the oven, the rule is low and slow. You want a low temp of 220 - 240 F and you will want to bake slowly for 20 to 30 min.

IF your glass is very thin glass, like really ‘I might break it if I press to hard with my fingers’ thin, you will want to put your bottle in the oven before you turn it on and then leave it in the oven while the oven cools off.
The bottles I used were pretty sturdy so I didn’t need to preheat my glass. I never once worried about breaking them while decorating or moving them around too much.
Once you pull your bottle out of the oven, you will notice that your clay is not super stiff. That’s because polymer clay is actually a plastic clay. It won’t get hard hard for quite some time. And it will never get as hard as ceramic clay from a kiln. But it will continue to get harder as it cools down. An interesting side note, since polymer clay is not water based, uncooked polymer clay does not need to be stored in an airtight containers. Don’t worry that you might not have cooked your clay long enough. This is going back in the oven again before we are finished.
At this point you should have bottle with clay all over it and that is cool to the touch.
It still looks random and not something your mom would be proud of but that’s ok.
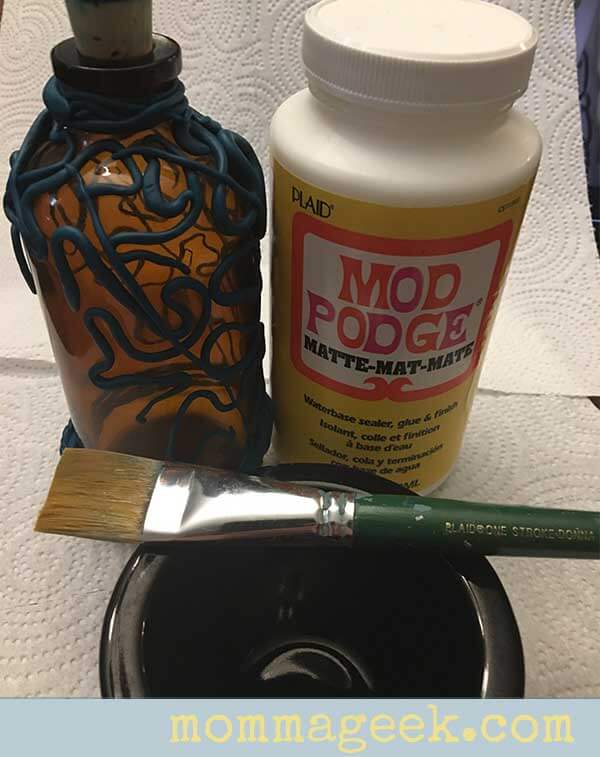
Notice the wide brush. The larger brush helps apply the Mod Podge both smoothly and quickly.
Next, take your Mod Podge and pour some in a bowl.
Using a paintbrush you will want to completely coat your bottle, but you don’t want to put so much on that it takes 3 days to dry. Here are a few Mod Podge pointers.
- Use a disposable bowl or make sure to wash your Mod Podge bowl right away when done using it. Also wash your paint brush.
- Brush the Mod Podge into the the clay areas of your bottle first. So get under and in between and all of those nooks and crannies. Then using the longest brush strokes your bottle will allow, cover the rest of the jar. You don’t want to let the Mod Podge puddle in your detailed areas or under your detailed areas because if will fill them in and once the paint is applied you wouldn’t be able to see the detail through the paint.
- If you have applied too much and the Mod Podge is still wet, try removing some with your paintbrush. Or if it is slightly tacky, you can use a brush that is well coated in Mod Podge to smooth it out. When it is really tacky or drying already, leave it alone. Don’t mess mess with it when it is partially dried because the paint brush won’t pull smoothly and it will start ripping it off and leaving a funny texture similar to when you touch your finger nails before the polish has dried. Worse case scenario here, you lost some detail. It’s not the end of the world. Keep going, it will look great.
- Your Mod Podge is taking forever to dry? Let it dry to the touch or mostly dry, then pop it into the oven at 220 – 240 for 10 to 20 minutes.
EXAMPLE OF WAY TOO MUCH MOD PODGE. This was my mistake. It took a very long time for it to dry like this.
I made the mistake of adding way too much Mod Podge the first time I made these bottles. I then took off as much excess as I could and then allowed it to dry. It still took a long time. A very thin coat is all that is needed to help the paint adhere to the bottle.
Now that your bottle is covered with Mod Podge.
Onto the paint.
We are using acrylic paint. Acrylic paint is really great. It is cheap and it is easy to paint with. Also it comes in every color. It’s a crafters best friend. Well, almost. It is, if you understand a little about it. Acrylic paint is water based. So it dries quickly. That is a good thing, right? We get through are project faster. Yes, it does. BUT if your paint starts to dry on your bottle and you go back over it with your wet paint brush, it will wipe the paint off the bottle. The reason is, that while the paint may be dry, its not cured. So it’s in kind of in a fragile state. If you go over it with anything wet, it will wash the paint off. Go over it with water? Wash the paint off. Go over it with wet pain, wash the paint off. Picking up what I’m laying down here? So if it starts to dry, just leave it alone.
We are going for thin even coats of paint. And this will take at least 2 coats of paint. Ok, so I mentioned how acrylic paint dries fast. And for this project, I want to mix lots of paint up. Enough paint to get a couple, and maybe possibly, 3 coats of paint onto this bottle. You can mix up one batch of paint and use it over an extended period of time without it drying out… But there is a trick to it.
When you are done with your paint and you want to keep it wet,
cover it with plastic wrap and set it in the refrigerator or somewhere cold. Then later, when you are ready to use your paint again, just pull it out, give it a good stir. This trick also works for water based interior paints for your home. Just put your brush or roller into a grocery bag and pop it into the refrigerator to keep it wet. See, you learned something new. Next, paint the dry bottle the same way you did your Mod Podge. Paint around the details of you polymer clay first, then with the longest brush strokes you can make, cover the rest of the bottle. (Note I used white, brown and silver paint as the base color) 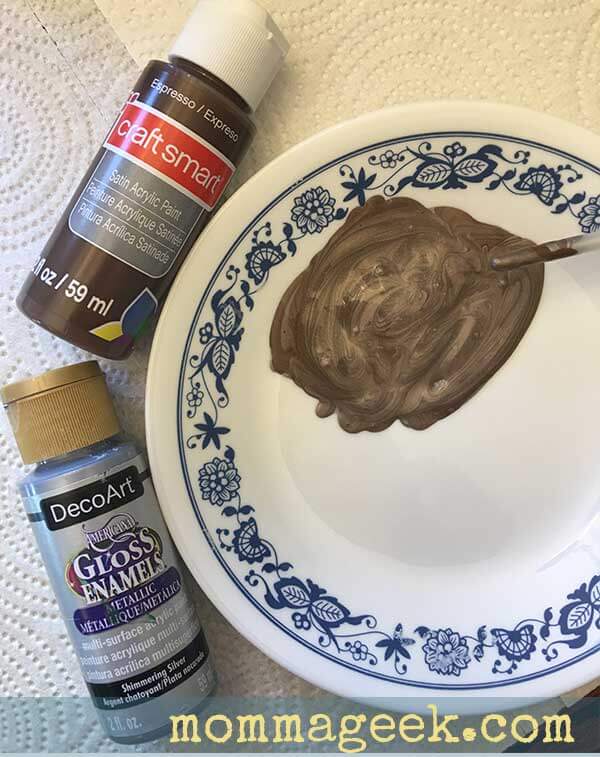
Now let the paint dry to the touch.
Once it is dry you can either wait until the next day to paint, or fast track the curing process with your oven. I used my oven. Pop your bottle back in for 15 to 20 min.
Pull it out, let it cool to the touch and put another coat on it. Once your second coat is on, you will need to decide for your self if you think it needs a third coat. If it does, bake and paint again. If it doesn’t, you can skip the bake and move on to the details. Next, I wanted to highlight the detail. I added a small amount of a darker brown under the polymer clay detail and I used a gold metallic paint on top of the clay detail.
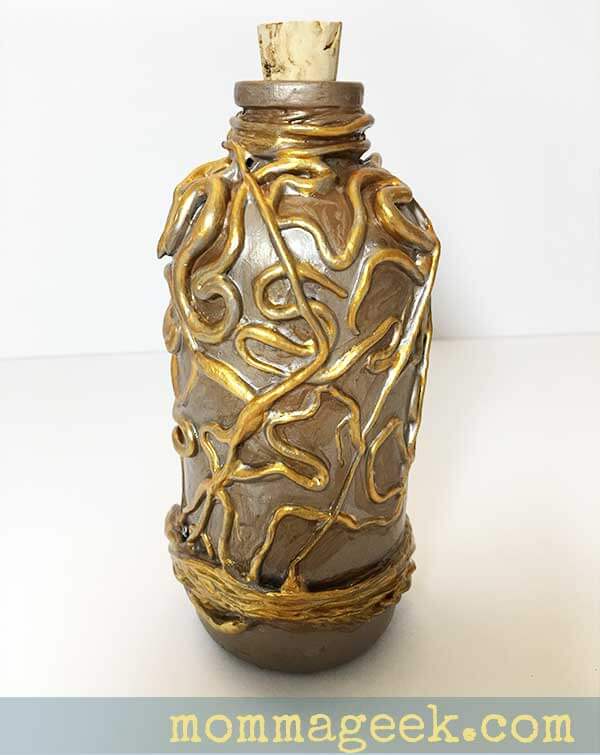
Notice that the gold paint is added to the top of the polymer clay detail
You don’t need to bake your jar again, although you can if you want to. It will speed the cure time on the paint and help it harden up faster. What do you think? Do you love it? I def did. I loved it so much that I went on to make 3 more. The rest of the tutorials are focused much less on technical detail since we got to the meat and potatoes of that in this tutorial. The remaining tutorials show the decorating techniques I used.
You can check out those tutorials with the following links:
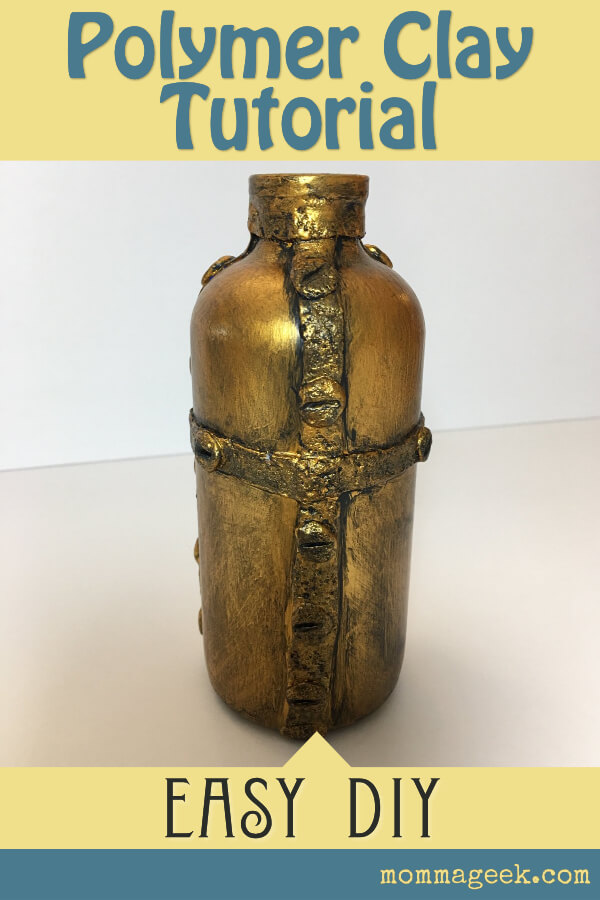
- Steampunk inspired bottle
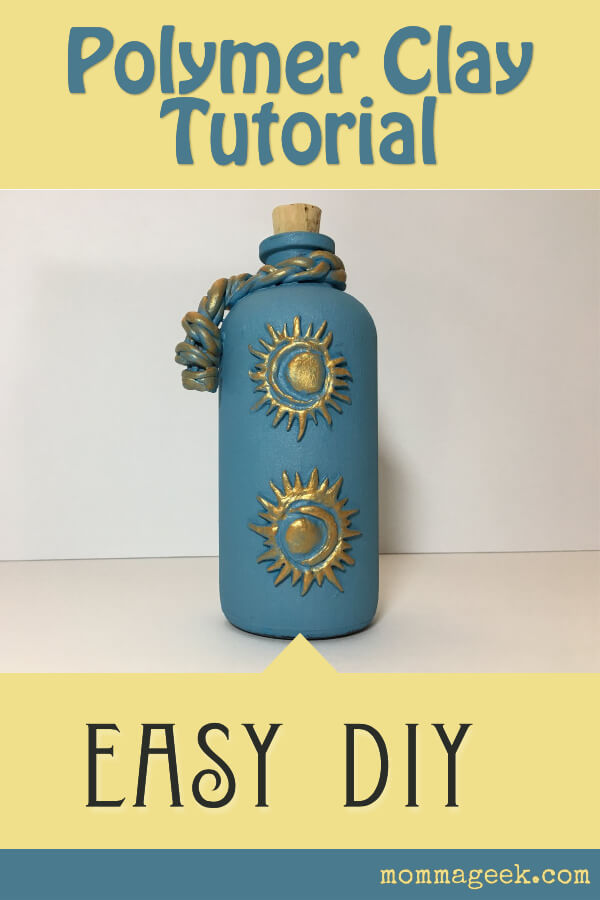
- Sun and Moon bottle with gold accents
- Snake oil bottle with free printable
The video below shows the snake oil bottle tutorial.
https://youtu.be/-gJPK8P_Kps